Improving your home’s energy efficiency starts with expert windows installation. You’ll need to accurately evaluate your window requirements and select the appropriate energy-efficient models. From measuring openings to removing old windows, each step requires precision. Proper sealing and insulation are crucial to prevent drafts and enhance insulation. Testing for air leaks confirms everything is snug. With meticulous attention to detail, every stage of the process contributes to a more comfortable and cost-effective living environment. Ready to transform your home into an energy-saving sanctuary? Let’s explore each step in detail.
Assessing Your Window Needs
Before you start the windows installation process, accurately assessing your window needs is crucial. Begin by evaluating the current state of your windows installation. Are they drafty, difficult to open, or showing signs of wear? Identifying these issues will help you determine if a full replacement or just repairs are needed.
Then, measure your windows accurately. Incorrect measurements can result in a poor fit, which can reduce energy efficiency. Use a tape measure to note the width and height of each window, and double-check your measurements. Ensure to measure from the inner edge of the frame for the most accurate results.
Take into account the orientation of your windows. South-facing windows may require different treatments compared to north-facing ones, as they receive more sunlight. This can affect your heating and cooling expenses.
Also, consider the local climate. Rainy or windy conditions might require windows with superior sealing capabilities.
Choosing Energy-Efficient Windows
After evaluating your window needs, the next step is to choose energy-efficient windows that best suit your home. Start by looking for windows with the ENERGY STAR label, which certifies that they meet strict efficiency guidelines set by the U.S. Environmental Protection Agency. These windows not only reduce your energy bills but also improve indoor comfort.
Consider the window’s U-factor, which measures how well the window insulates. A lower U-factor means better insulation. Also, check the Solar Heat Gain Coefficient (SHGC); a lower SHGC indicates the window installation blocks more heat from the sun, which is vital in warmer climates.
In colder areas, a slightly higher SHGC can help with passive solar heating.
Frame material matters too. Vinyl, wood, fiberglass, and composite frames each offer different levels of insulation and durability. For example, vinyl and fiberglass frames are low-maintenance and provide good insulation. Look into double or triple-pane windows filled with inert gas like argon for added insulation and noise reduction.
Lastly, pay attention to the window’s design. Casement windows generally seal tighter than sliding windows, making them a more energy-efficient choice. By choosing the right energy-efficient windows, you’ll enhance your home’s comfort and save on energy costs.
Measuring Window Openings
Measuring window openings accurately is vital for a successful installation. Start by gathering a tape measure, pencil, and notepad. Begin with the width: measure the top, middle, and bottom of the window opening. Write down the smallest measurement to make sure the new window fits snugly.
Next, measure the height: take measurements on the left, center, and right sides. Again, note the smallest measurement. This step secures the window will fit properly without leaving gaps that can lead to energy loss.
Don’t forget to measure the depth of the window frame. This is important if you’re replacing old windows with new, thicker ones. Measure from the inside trim to the outside wall to get an accurate depth measurement.
Double-check all measurements to avoid costly mistakes. Even a slight error can result in poor insulation and reduced energy efficiency. Additionally, if your window openings aren’t perfectly square, note any discrepancies. This will help you or your installer make necessary adjustments during installation.
Preparing the Installation Area
Having accurately measured your window installation openings, you’re ready to prepare the installation area. Start by clearing the area around your windows, both inside and outside. Move furniture, curtains, and any other obstructions to create ample working space. This not only helps you work efficiently but also prevents potential damage to your belongings.
Next, verify that the area is clean. Remove any dust, dirt, or debris around the window frames. Use a vacuum or a brush to get into those hard-to-reach corners. A clean workspace ensures a better seal and proper fit for your new windows.
Inspect the window frame for any signs of rot, mold, or structural damage. If you find any issues, address them before proceeding. Repairing these problems beforehand will prevent future complications and enhance the overall energy efficiency of your new windows.
Removing Old Windows
Before you can install new windows, you need to remove the old ones. Start by removing any window treatments, such as blinds or curtains.
Next, carefully detach the interior trim using a pry bar. Be gentle to avoid damaging the wall or trim, as you may want to reuse it. Once the trim is removed, locate and unscrew any fasteners or nails securing the window installation frame to the wall.
Carefully cut through any caulk or sealant around the window using a utility knife. This will help ease the removal process and prevent damage to the surrounding structure.
With the caulk cut, use a pry bar to gently lift the window frame away from the wall. Work slowly and methodically to avoid causing any unnecessary damage.
Once the window is loose, have a partner help you lift it out of the opening. Windows can be heavy and awkward, so having an extra set of hands will make the process safer and more manageable.
Inspecting and Repairing Frames
With the old windows removed, it’s crucial to inspect the existing window frames for any signs of damage or decay. Check for rot, mold, or any structural weaknesses that could compromise the new windows ‘ installation and performance. Use a flashlight to look closely at the corners and edges, where damage often starts.
If you find any soft or discolored wood, it’s typically a sign of rot. Use a screwdriver to probe these areas; if the wood gives way easily, it needs to be replaced.
Don’t forget to check for any gaps or cracks that could let air or moisture in. Even small imperfections can lead to significant energy loss over time.
After identifying any issues, repair them promptly. For minor cracks, use a high-quality wood filler and sand it smooth once it dries.
For more extensive damage, you may need to replace the affected sections of the frame. Ensure that any replacement wood matches the existing frame in size and type to maintain structural integrity.
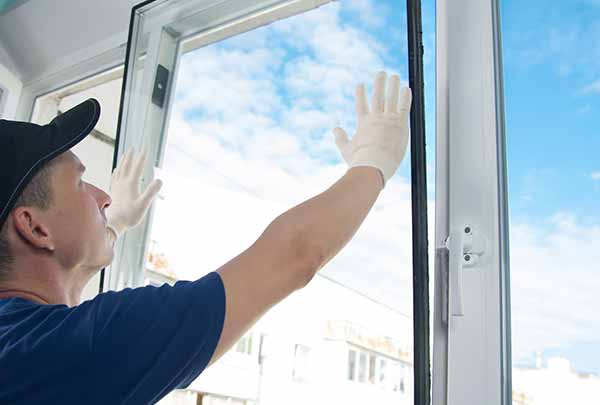
Installing New Windows
Once you’ve verified that the frames are in good condition, you’re ready to install the new windows. Begin by carefully removing the new window from its packaging, making certain you don’t damage any part of it.
Position the window into the frame, ensuring it fits snugly. Use a level to confirm that the window is straight both horizontally and vertically. If it’s not level, make necessary adjustments by using small shims.
Once the window is perfectly aligned, secure it in place with screws. Start with the top corners and then move to the bottom, ensuring each screw is tightly fastened. Be cautious not to overtighten, as this could warp the frame or windows installation.
Next, verify that the window opens and closes smoothly. Test the locks and other hardware to confirm everything functions correctly. If anything feels off, make adjustments before proceeding. Once you’re satisfied with the fit and operation, trim off any excess shims sticking out.
Sealing and Insulating
Properly sealing and insulating your new windows is fundamental for maximizing energy efficiency. To start, use weatherstripping around the edges of your windows. This creates a tight seal that prevents air from leaking in or out. Foam weatherstripping is an excellent choice because it’s easy to apply and provides strong insulation.
Next, apply caulk around the exterior frame. Choose a high-quality, weather-resistant caulk for the best results. Make sure you fill any gaps or cracks thoroughly to keep drafts at bay. Smooth the caulk with a caulking tool or your finger for a clean finish.
Insulating the window frame is just as important. Insert fiberglass insulation around the interior frame to block any small air leaks. Be cautious not to compress the insulation too much, as this can reduce its effectiveness.
Spray foam insulation is another option, especially for hard-to-reach areas.
Testing for Drafts
After sealing and insulating your windows, it’s important to test for drafts to confirm your efforts are effective. Begin by closing all windows installation and doors in your home. Turn off any fans, heating, or cooling systems to verify you’re not mistaking airflow from these sources as drafts.
Next, light a candle or incense stick and slowly move it around the edges of your windows. If the flame flickers or the incense smoke wavers, you likely have a draft. Pay special attention to corners and where different materials meet, as these are common problem areas.
Another method is to wet your hand and run it around the window frame. A draft will feel like a cool breeze against your skin. This method is particularly helpful if you don’t have a candle or incense on hand.
For a more high-tech solution, consider using an infrared thermometer. Point it around the window frame to detect any cold spots that indicate drafts.
Address any detected drafts immediately. You might need to apply more caulk or weatherstripping. Regularly testing and maintaining your windows in this way sustains ongoing energy efficiency and comfort in your home.
Final Touches and Clean-Up
Having addressed any drafts, it’s time to focus on the final touches and clean-up. You want to make sure your new windows not only function efficiently but also look great and blend seamlessly with your home’s decor. Here’s a step-by-step guide to help you complete the job:
- Seal the Edges: Apply a high-quality caulk around the edges of the windows. This will prevent any future drafts and keep your home energy-efficient. Make sure to smooth the caulk with a tool or your finger for a clean finish.
- Install Trim and Molding: Reattach or install new trim and molding around the window frame. This helps to cover any gaps and gives a polished look. Measure and cut the trims accurately to ensure a snug fit.
- Clean the Glass and Frames: Use a non-abrasive cleaner to wipe down the glass and frames. This will remove any fingerprints, smudges, or residue left from installation materials. Clean windows also maximize natural light.
- Dispose of Debris: Gather any leftover materials, old windows installation parts, and packaging. Properly dispose of these items according to your local regulations. Keeping your work area clean guarantees safety and a tidy finish.
Conclusion
By following these expert windows installation steps, you’ll greatly enhance your home’s energy efficiency and comfort. Start with a thorough assessment, choose the right energy-efficient windows, and measure openings accurately. Careful preparation, removal, and installation are key. Don’t forget to seal, insulate, and test for drafts meticulously. Finish up with attention to final touches and clean-up. With these steps, you’ll enjoy lower energy bills and a cozier home environment.